Ivan, intern from the Design Hub, has made the next gen fidget spinner.
The fidget spinner made from a transmission gear box that can be reduced 1 to 10. Which means the ratio of the numbers of turns that the fidget spinner moves.
This individual project was originally intended on being model for a transmission gear box. But not for heavy industrial motors such as those found in cars or any other kind of automobiles. The actual one will be for smaller, motors that would accept it better. Since the model was finished, Its original use of the project as a model had been completed.
So now its new purpose is a handy dandy fidget spinner! Discovered by ARC Design Hub Head Randy Schuster.
Ivan’s current plan is to build 10 fidget spinners out of this little plastic model. The final product of this model will move and twist at a super slow speed, Its a creative way to put this idea together.
Modeled and designed using the program, AutoCad. Its also Ivan’s deliverable from Randy.
The stack of ten fidget spinners will not be sold as a whole. However, each individual fidget spinner will be going on sale soon in the ARC Bookstore.
The price of the fidget spinner is going to be approximate $4 per spinner.
Since the model is made out of plastic its not going to be used as real motors.
The real one is made from a sturdy material such as metal and steel. It took Ivan 3 days, Approx. 6 hours to design the model himself. It took one week of 3D printing to make it come to life!
This wonderful materialistic piece created by Aygul Akhmadeeva shows off how beautiful her project has came out.
This project might interest Sacramento residents due to a 3D look of the Folsom lake map! Sacramento’s most populated Lake , Folsom Lake is a place worth getting water from Tahoe’s mountain range. Its light blue color ,this map features all main roads leading up to the lake.
The Depth of the lake is shown in the pieces as well. They decided to not stop on working with wood, but add a new material to make the project interesting but also challenging and experimental. They decided to work on a material that they never used before- epoxy! The Materials used in this project was wood, clear casting epoxy, blue epoxy, it is filled that will create a realistic view of the lake water.
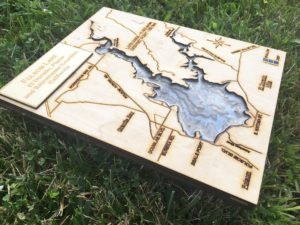
It measures approx. 10 ½ x 8 ½ x 5/8 ; This piece is about 5 layers thick!!!
Aygul Akhmadeeva stated, “ If we do a couple layers of a 2D cut of wood we can create a 3D visual effect.”
This project took about a month to complete. Aygul stated, “ It is possible to create this project within 1 day only with all equipment and material available.”
All projects have there side effects or there difficulties within a certain project. One was choosing the settings for the laser. Second, was to get familiar on how to work with epoxy. Due to its ingredient being limited time only to use it. The way Aygul accomplished this process was due to making dozen of experiments with the material.
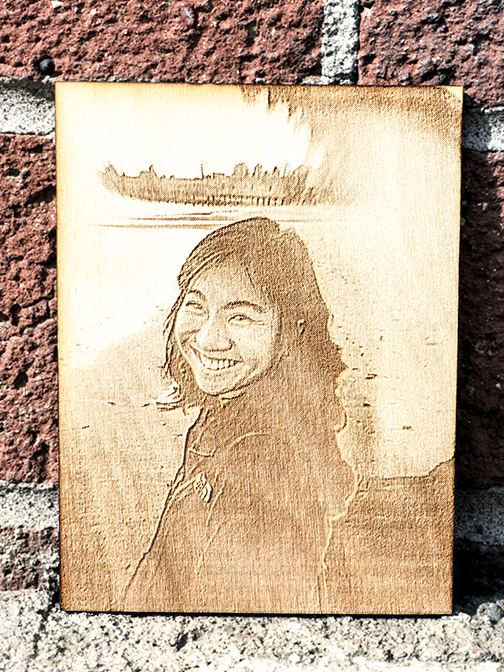
At the Design Hub, we are constantly putting our beloved laser engraver to work, and now we’re looking at YOU: artists, photographers, models, and students of ARC! If there is any interest in engravings of any photo/drawing/art work that anyone would want, we are here to help you capture that magic on wood.
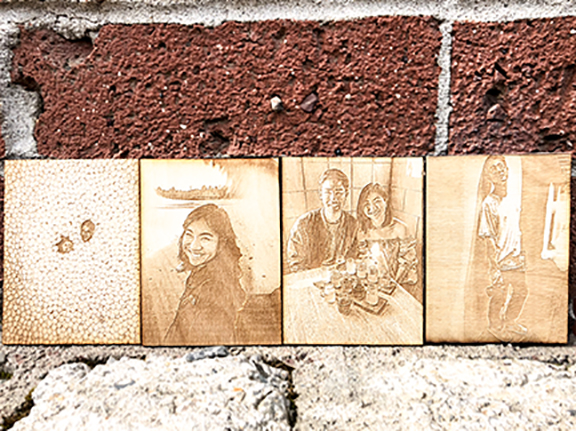
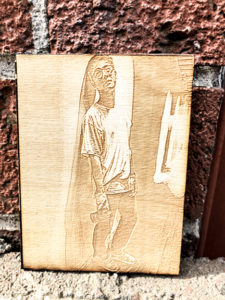
Our photography intern Kyle Chan has been testing out his own photographs taken from both a dslr camera as well as his iPhone X.
He tells us that, “Being a photographer, seeing the photos printed out and having a tangible piece of artwork is always thrilling, and to create one through such a thrilling process makes the work that much more meaningful for me.” Kyle gifted his photos to his girlfriend for her birthday, and was extremely excited to see his own work engraved into something unique and tangible that will withstand the tests of time.
With a strong rustic flare, these laser engraved photos make for a really cool grad present. What’s even cooler is the fact that it was created by the hands of our very own American River College peers.
The Design Hub of American River College is now introducing a first time ever opportunity for students all around the campus who are graduating this Spring of 2018 to get their portrait taken by specially selected advanced photography interns of the Design Hub.
The price per portrait ordered by each student is still yet to be determined, ranging in the area around roughly $10, as a vague estimate. In the last few weeks of April, we will set up a temporary photography studio in the ARC Bookstore. We could take a certain set number of graduates on a first come, first serve basis. There would also be monetary gains for the photographers. The portraits will be made using our laser etcher on 1/8″ thick birch plywood (5×7 or 4x6ish). The photographs will be PS edited so that they come out best on the plywood.
The people involved in this project are Brandy Worsfold, Randy Schuster, Aaron Stanley, who works in the bookstore as a Bookstore Buyer, and all of the photography interns for the Design Hub. Randy ordered this work and assigned the photography interns to this position. He created this fantastic opportunity for the graduates and the photography interns, and worked with Aaron Stanley from the ARC bookstore to help bring the idea to life!
This project is being created to give the graduates a long lasting portrait that they can take with them for the next steps in the life, and in their futures. The Graduation Portrait Laser Engraver first was created in late February/early March, and is currently being set up to be executed in early May. The training for the photography interns to prepare for portraitures has been occuring during the month of March and April, and we predict to begin taking the pictures in early May. We plan on continuing taking portraits for other projects during future semesters.
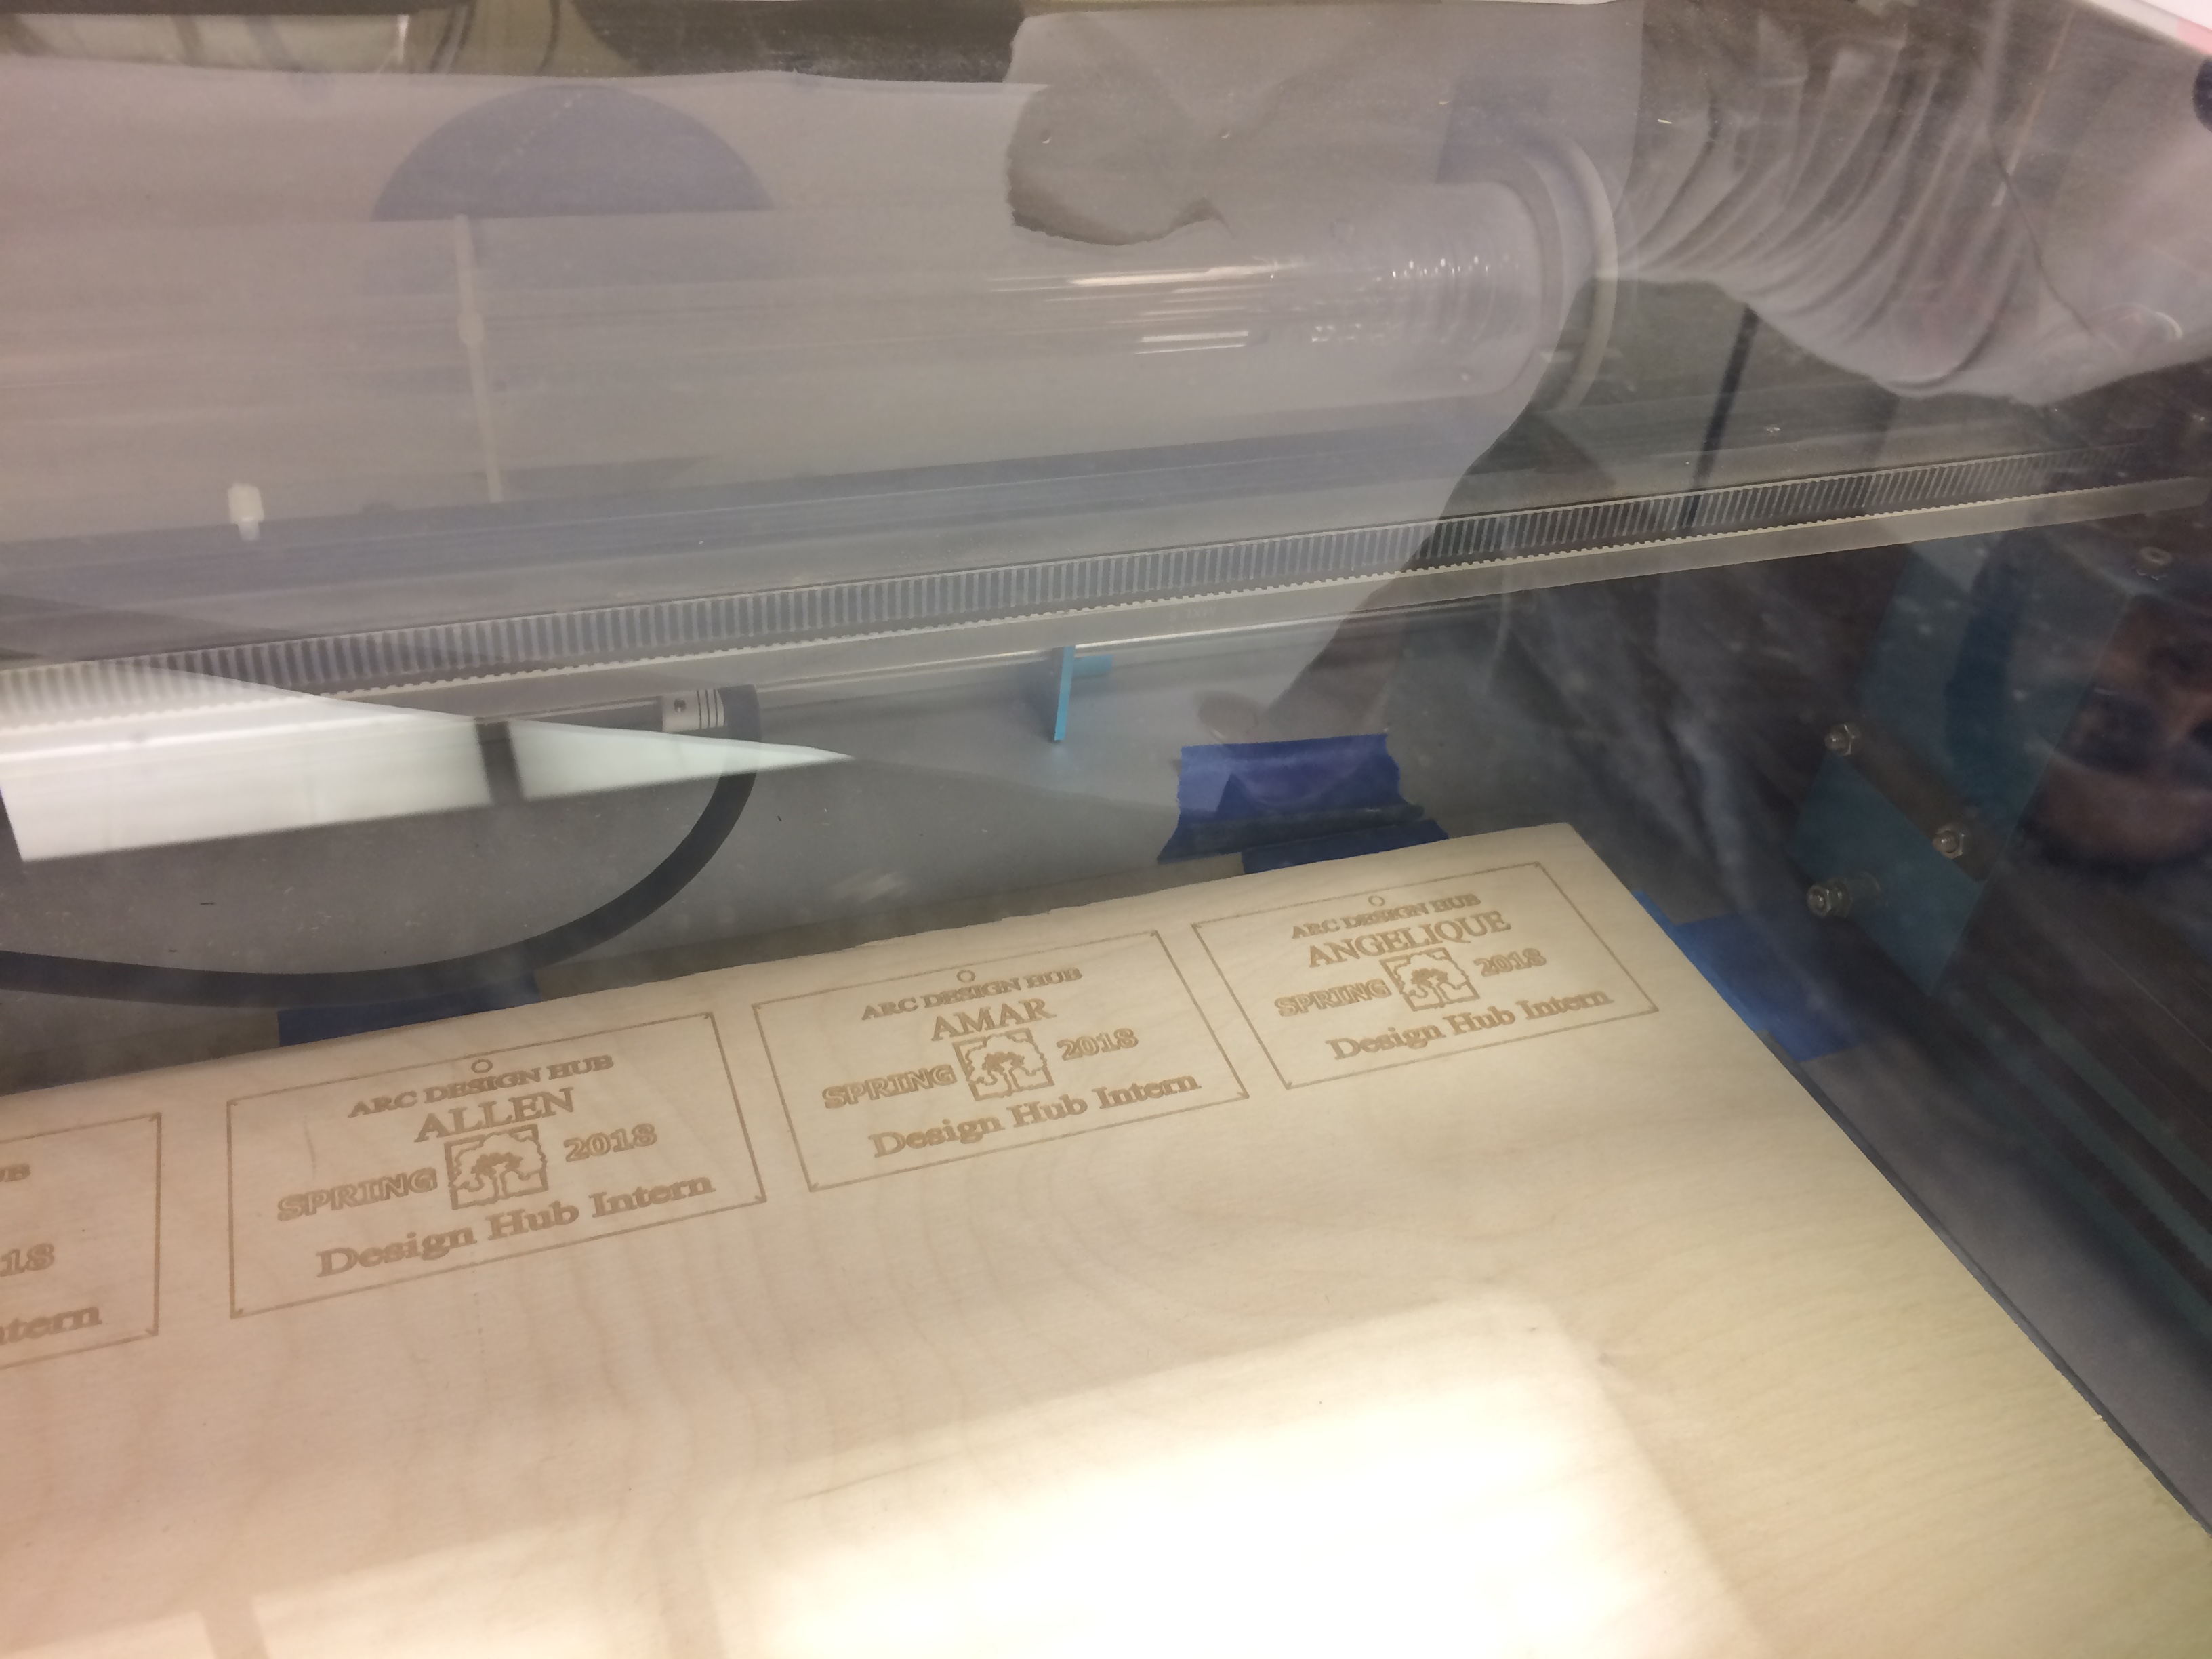
The Design Hub of American River College conducted one of the first projects using the Laser Engraver. Shailza, one of the laser engraver interns working on this project, demonstrated how it produces the gentle, artistic shades of black and white on the sturdy wooden boards. Plywood is used as the canvas, and the laser carves in its drawings. The Laser Engraver obeys the commands sent by the software on the computer to create whatever artwork the intern orders it to. For this particular project, the deliverables are name tags made of wood for all the interns who are working for the Design Hub.
This project of engraved name tags gives all the interns a sense of community, since we are always collaborating and working together to contribute each unique skill set to the various projects. The original idea for this project was right at the beginning of this spring semester because it gives a feeling unity and family to the new incoming interns just now joining the team. The engraved name tags were completed a couple of weeks ago, and can be viewed in the Design Hub lab. Even though the actual project for the engraved name tags is complete, the Laser Engraver will be frequently used during the full course of this semester.
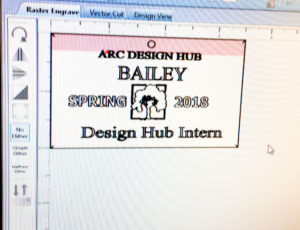
The Full Spectrum Laser Retina Engrave 3D software orders the laser to cut out the name tags. The shaded pink section we can see in the photo to the left is the area that the laser already engraved, and the white areas are what is left to be carved until the project is finished.
Shailza, a hard-working intern trained in the art of laser engraving, showed a one-on-one demonstration of the laser engraver in action! First, you open up the file in the special software, Full Spectrum Laser Retina Engrave 3D. She showed the computer settings required for the engraver.
FUN FACTS:
Whatever image that the intern wants to print must be in xps format
The raster power CANNOT be at 100%- we have found it most effective to be set at 65-70% for the best wooden artwork.
The raster speed is set between 45-50%, and the vector layers power is set at 70%. The IP address should show up on the laser screen.
And “Slow jog” isn’t just something a student does when they’re late to class on a Monday morning after sleeping through their alarm, it’s also the setting on the control panel to give the intern more control over the laser so it doesn’t go flying off in a frenzy.
Once the settings are properly set, the wood is positioned to be carved into, and watch the time at the bottom of the screen allows the students a time frame for when their project should be completed. The average time is 7-8 minutes- like for the name tag project- but it depends on the size of the wood/project.
The laser engraver, Photo by photography intern Angelique Doty
The next project also on the Laser Engraver leads us to meet Jacob Olson, who brings ideas to life through the art of 3D printing and laser engraving. He is trained in laser engraving and is a solid modeler for the Design Hub. He also tutors design technology programs such as Autocad, Revit, Sketchup.
Jacob takes family photos, and creates images printed onto wood through the scientific world of computers, cyberspace, and LASER TECHNOLOGY (cue the “Twilight Zone” theme song).
Jacob is providing this project with his own family photos of his great grandparents, inspired by his father’s idea, and giving them as a present to his grandpa. The end product will be a collage of family photos laser engraved in the plywood. Jacob showed us around the laser engraver to get a feel for it and showed me exactly how the machine works: the water filter from the bucket pumps up water and keeps the laser tube cool while the exhaust fan pulls out smoke and filters out the exhaust to prevent turning the interns’ hard work into a barbecue. There’s a cycle of water that goes from being pumped from the bucket, to the laser tube and back to the bucket in a little circle of life.
The artists of the Design Hub have an ongoing task of creating new ideas to contribute to being engraved into wood using the Laser Engraver. There has been extensive training to prepare the interns on how it’s used, including training sessions they attended, as well as sample tests before running the actual name tag project.
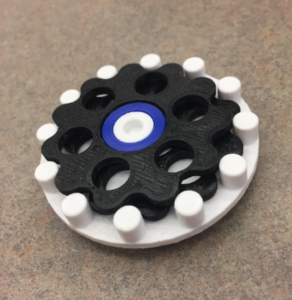 The fidget spinner made from a transmission gear box that can be reduced 1 to 10. Which means the ratio of the numbers of turns that the fidget spinner moves.
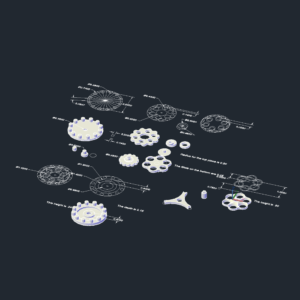 Modeled and designed using the program, AutoCad. Its also Ivan’s deliverable from Randy.
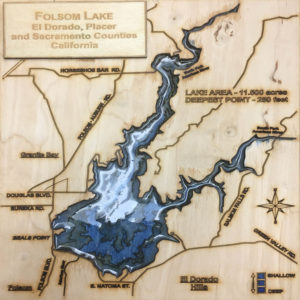
 This project might interest Sacramento residents due to a 3D look of the Folsom lake map! Sacramento’s most populated Lake , Folsom Lake is a place worth getting water from Tahoe’s mountain range. Its light blue color ,this map features all main roads leading up to the lake.
 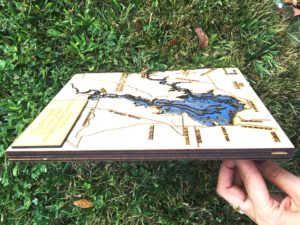 It measures approx. 10 ½ x 8 ½ x 5/8 ; This piece is about 5 layers thick!!!
 Our photography intern Kyle Chan has been testing out his own photographs taken from both a dslr camera as well as his iPhone X.