Katrina is an anthropology professor here at ARC. Is doing all 3D printing.
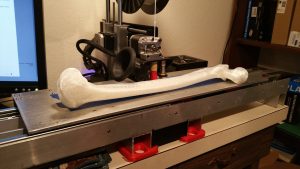
A femur bone, Known from our website if you saw the header.
So we the design hub have built a 3D printer for Prof. Katrina . She is responsible for the Anthropology of printing bones and studying the bones from dig sites.
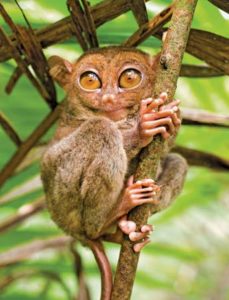
According to the Encyclopedia Britannica, ” Tarsier is a primate found in various of islands in Southeast Asia. They look like a lemur and a monkey combined. ” Picture from the site is displayed on the left.
In the Design Hub we have amazing 3D modeling students that can help fix any model that the clients need fixing.
Unlike Engineers who work with numbers, the artists can visualize and make decisions on what something looks like. they are able to look at many references in need if they do struggle in dire situations.
Anthropologists give really good data, which they are able to access a certain software. This certain type of software is called “Mesh Lab” . Which allows us to access the data we need. Prof. Matt Stoehr and some modeling students were able to arrange the data for the 3D printer. Which she can go ahead and print what ever she needs.
If there was any mess ups in the scanning process, the artists are able to clean up any screw ups that were left behind.
When Traiser was scanned it came out all pixelated squares. Which was the interesting part of it. But our artists were able to smooth and make the scan look what it should look like.
ARC Intern Chris Porter, A 3D modeler and animation student had worked with her on stuff like this right now.
Femur
Engineers built a long beds so that she was able to print larger scaled bones such as the femurs.
From there she will be able to print any bone, or even huge human femurs. It can even print the entire skeleton!
Day of the Dead. In this holiday focuses on the gathering of families and and friends in praying to remember family and friends that have died.
Here at the design hub we are working on a seasonal project for this special holiday.
The project began October 1 and will continue until November 2, when the Day of the Dead officially ends.
Photos taken by Angelique Doty
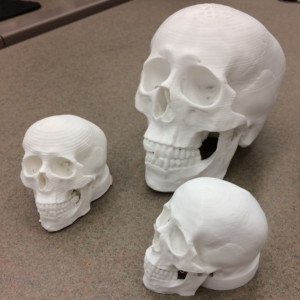
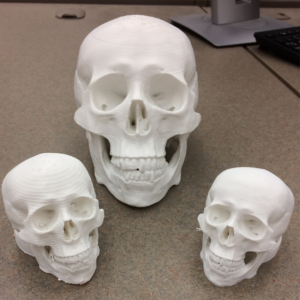
They are making a small scaled skull to sell at the bookstore for approximately one dollar per skull.
This creative idea was suggested by one of our amazing interns Erika Gonzales. Who thought of this project due to a previous project “Bobble-head Project”.
The bobble-head project is about peoples heads getting scanned by the 3D scanner by the 3D scanning interns here at the Hub. Making it into amazing scanned heads for bobble-heads.
Photos taken by Angelique Doty
The project inspired the idea for this project to create skulls using the same method as the bobble-heads.
First, a full sized skull that Erika brought in was scanned. Next they 3D printed this life sized skull. Now, Smaller Scale skulls are in the progress of being created , Then painted by the Artist team.
The artist team consist of : Erika, Summer and Regan.
Currently, the artist team is finding a location to sell these 3D scanned and printed skulls at any local Day of the Dead Event.
Future development from this project includes making the skulls into bobble-heads, earrings, and charms for people to make their own jewelry from them such as necklaces and bracelets.
Final step of this project is to paint and seal the skulls in the paintwork with a special sealant that prevents any staining.
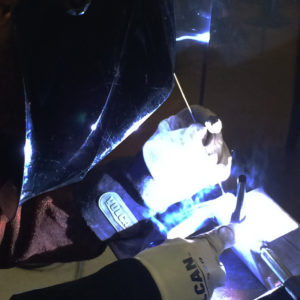
Allen Peterson and U.N.I.T.E. was involve with a certain project. In this particular project, He used the plasma cutter to cut out aluminum shapes to create a unique design made by the Landscape Architecture Class. The Aluminum shapes is a “mock up” of a plan that the Landscape Architecture Class constructed for a future project.
Photo & Edit by Angelique Doty
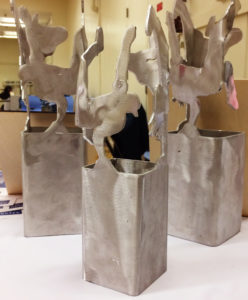
The little metal sculpture will someday be built like posts or fenced around a building. The square bottom part will acted as a fence and the top parts with magnificent design, like birds and trees. It will act to give it a unique design to help make the area it was located in very attractive!
This beautiful piece was created approx. 3 hours in only one day!
Design Hub’s participation to this project supports the architecture students creativity. The Architecture class needed a miniature variant of the final project to be able to test out the original idea. In a way, They can predict upcoming obstacles or arrangements that may arise in the future.
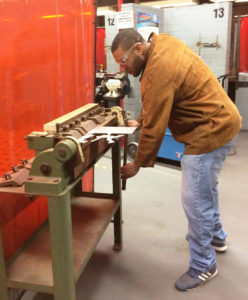
Photo & Edit by Angelique Doty
From a photograph, Allen was able to set it up on a plasma cutter.
Future developments from this project is a metal trophy of a break-dancer for the winner of the Break Dancer Competition for U.N.I.T.E.
Further development from American River College tree logo on April 24 that Allen made.
Photo & Edit by Angelique Doty
This project has traveled to a few locations-
Design Hub to the welding location , then back to Design Hub and then off to be displayed at the Architecture Class.
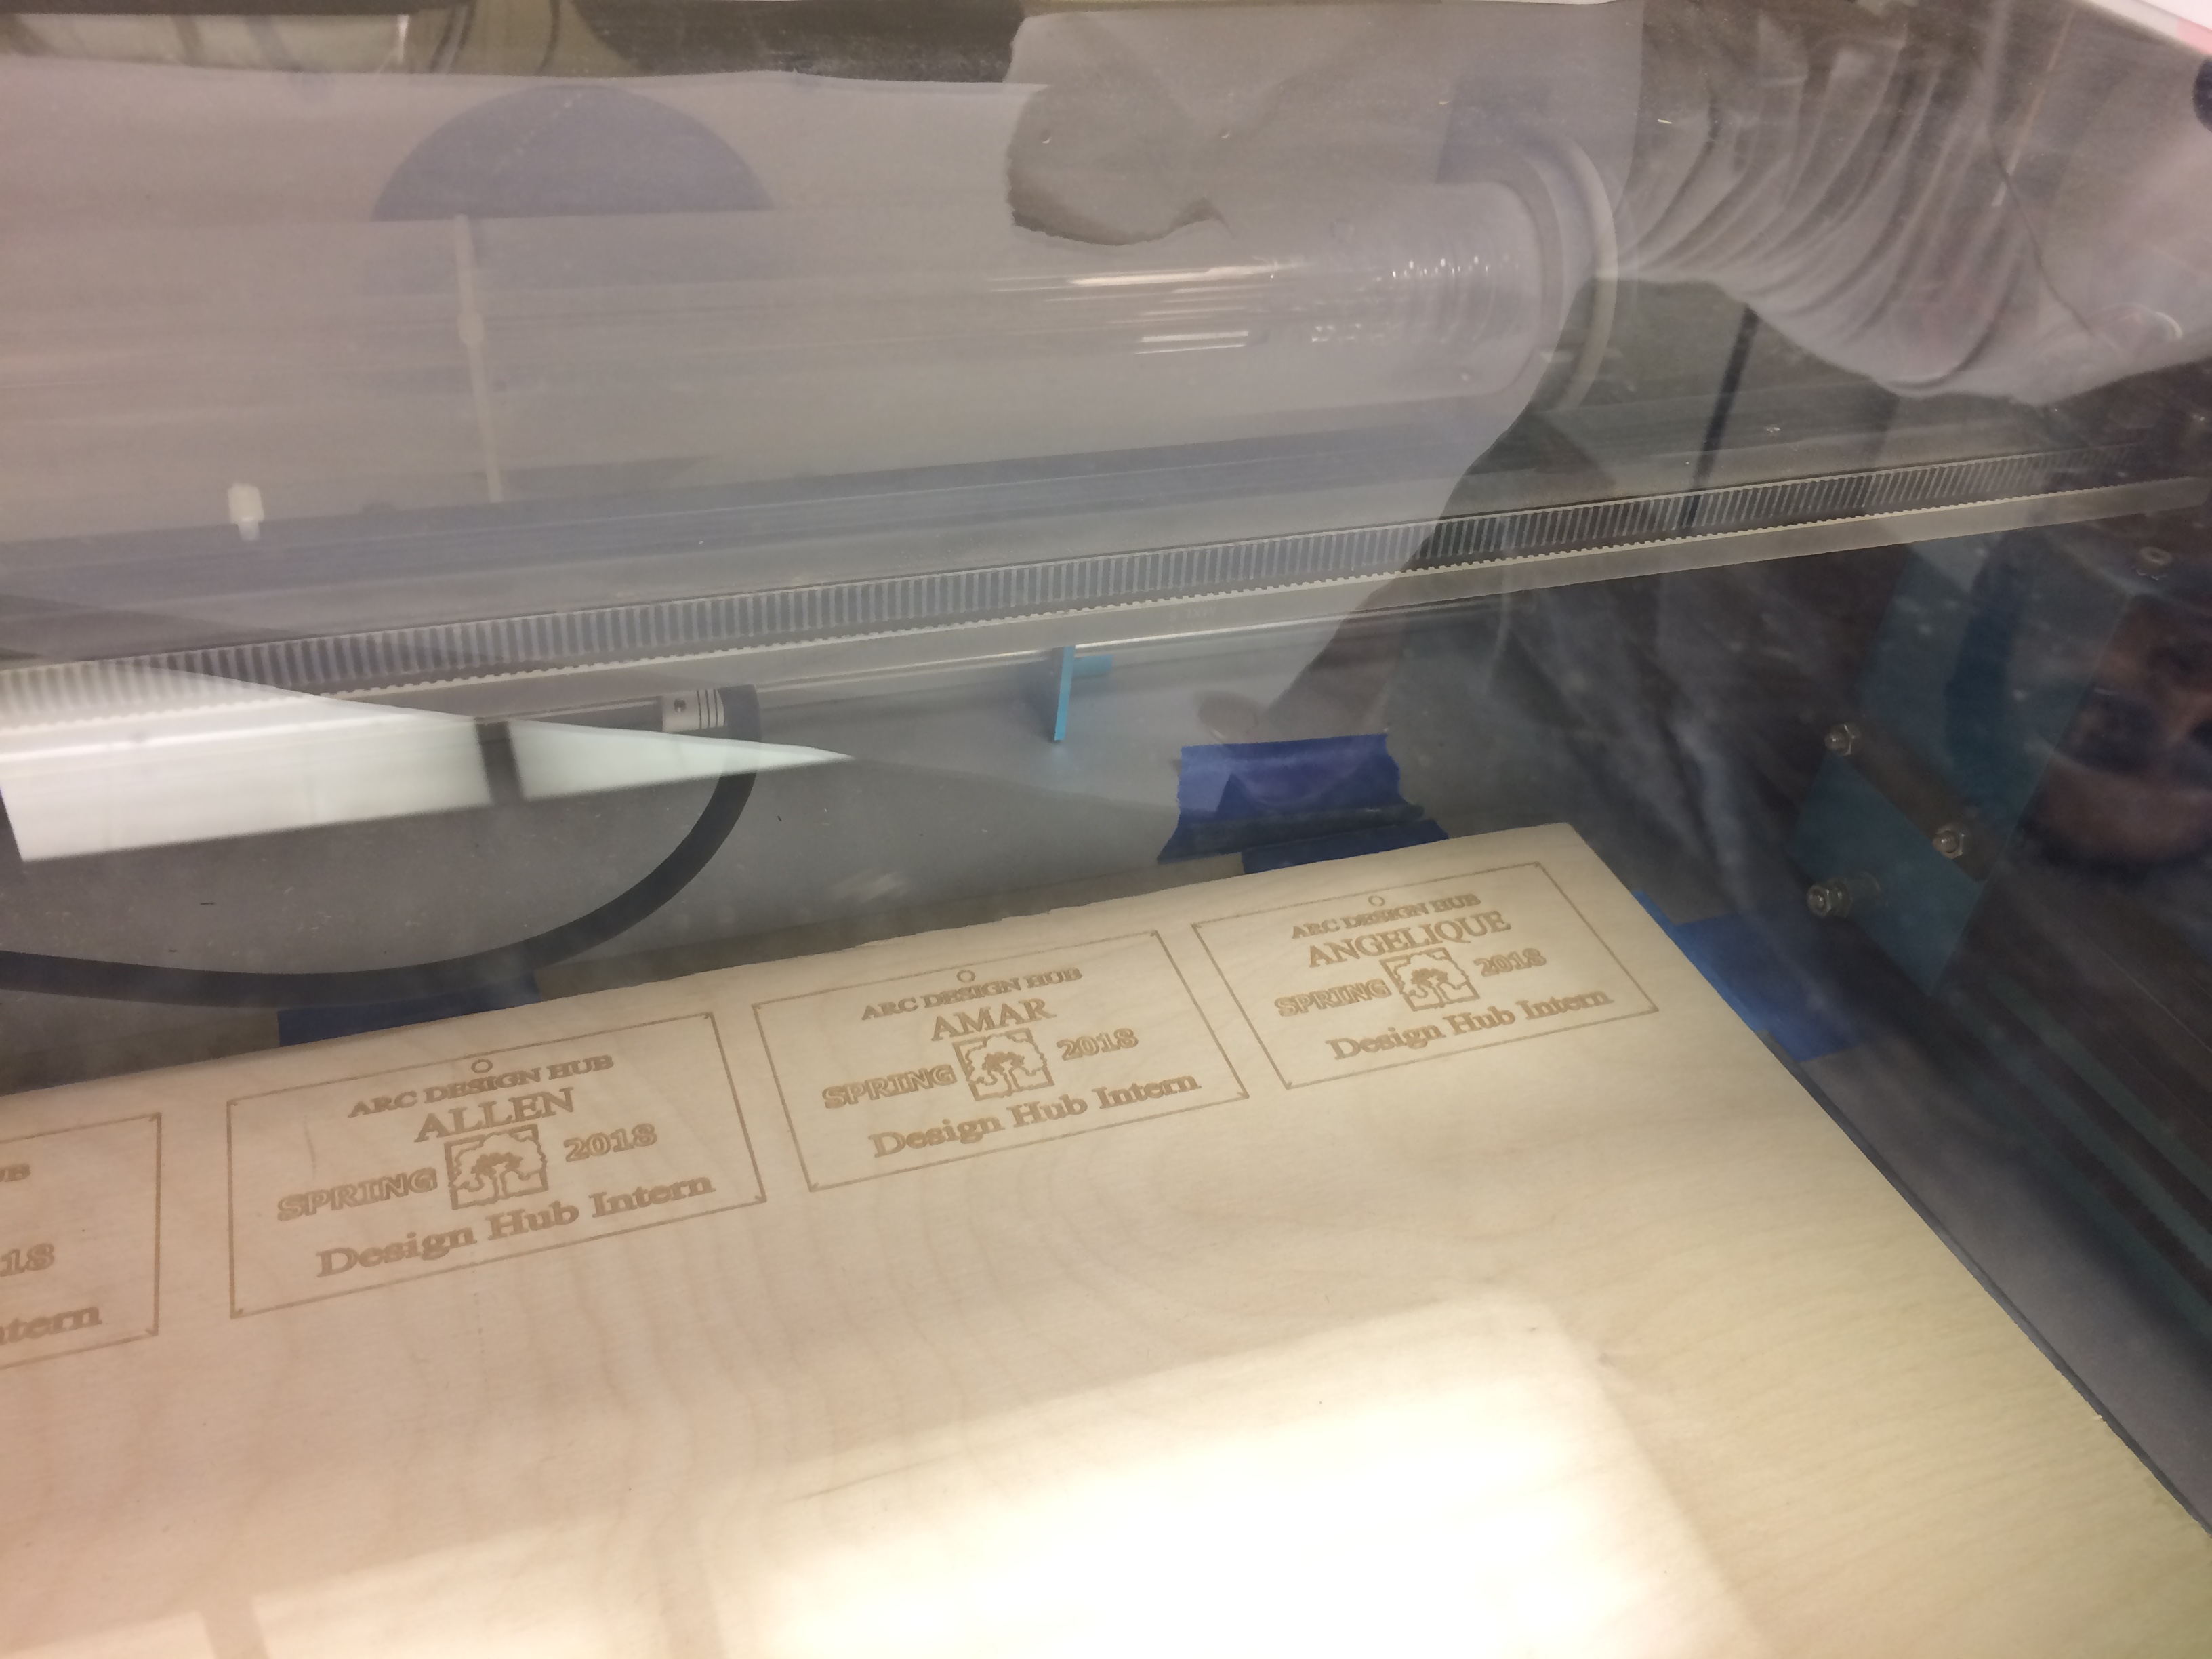
The Design Hub of American River College conducted one of the first projects using the Laser Engraver. Shailza, one of the laser engraver interns working on this project, demonstrated how it produces the gentle, artistic shades of black and white on the sturdy wooden boards. Plywood is used as the canvas, and the laser carves in its drawings. The Laser Engraver obeys the commands sent by the software on the computer to create whatever artwork the intern orders it to. For this particular project, the deliverables are name tags made of wood for all the interns who are working for the Design Hub.
This project of engraved name tags gives all the interns a sense of community, since we are always collaborating and working together to contribute each unique skill set to the various projects. The original idea for this project was right at the beginning of this spring semester because it gives a feeling unity and family to the new incoming interns just now joining the team. The engraved name tags were completed a couple of weeks ago, and can be viewed in the Design Hub lab. Even though the actual project for the engraved name tags is complete, the Laser Engraver will be frequently used during the full course of this semester.
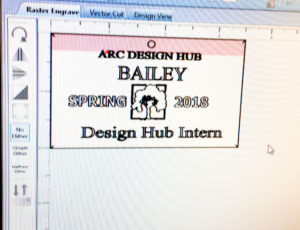
The Full Spectrum Laser Retina Engrave 3D software orders the laser to cut out the name tags. The shaded pink section we can see in the photo to the left is the area that the laser already engraved, and the white areas are what is left to be carved until the project is finished.
Shailza, a hard-working intern trained in the art of laser engraving, showed a one-on-one demonstration of the laser engraver in action! First, you open up the file in the special software, Full Spectrum Laser Retina Engrave 3D. She showed the computer settings required for the engraver.
FUN FACTS:
Whatever image that the intern wants to print must be in xps format
The raster power CANNOT be at 100%- we have found it most effective to be set at 65-70% for the best wooden artwork.
The raster speed is set between 45-50%, and the vector layers power is set at 70%. The IP address should show up on the laser screen.
And “Slow jog” isn’t just something a student does when they’re late to class on a Monday morning after sleeping through their alarm, it’s also the setting on the control panel to give the intern more control over the laser so it doesn’t go flying off in a frenzy.
Once the settings are properly set, the wood is positioned to be carved into, and watch the time at the bottom of the screen allows the students a time frame for when their project should be completed. The average time is 7-8 minutes- like for the name tag project- but it depends on the size of the wood/project.
The laser engraver, Photo by photography intern Angelique Doty
The next project also on the Laser Engraver leads us to meet Jacob Olson, who brings ideas to life through the art of 3D printing and laser engraving. He is trained in laser engraving and is a solid modeler for the Design Hub. He also tutors design technology programs such as Autocad, Revit, Sketchup.
Jacob takes family photos, and creates images printed onto wood through the scientific world of computers, cyberspace, and LASER TECHNOLOGY (cue the “Twilight Zone” theme song).
Jacob is providing this project with his own family photos of his great grandparents, inspired by his father’s idea, and giving them as a present to his grandpa. The end product will be a collage of family photos laser engraved in the plywood. Jacob showed us around the laser engraver to get a feel for it and showed me exactly how the machine works: the water filter from the bucket pumps up water and keeps the laser tube cool while the exhaust fan pulls out smoke and filters out the exhaust to prevent turning the interns’ hard work into a barbecue. There’s a cycle of water that goes from being pumped from the bucket, to the laser tube and back to the bucket in a little circle of life.
The artists of the Design Hub have an ongoing task of creating new ideas to contribute to being engraved into wood using the Laser Engraver. There has been extensive training to prepare the interns on how it’s used, including training sessions they attended, as well as sample tests before running the actual name tag project.
The Design Hub here at American River College is a strong proponent of multidisciplinary collaboration. At the Hub, team-building across all planes is valued and celebrated. It is a place where the arts and sciences come to eclipse, and the outcome is something truly spectacular.
Artist intern Erika hard at work. Photo by photography intern Angelique Doty
Here, we meet Erika Gonzalez to learn more about about her job as an artist for the Design Hub. Her current project: to paint the cell membrane models for the Science Department. These little cell membranes required the help of Erika’s excellent painting skills, 3D printing, the Science Department, and 3D modelers to create the cell membrane structure. Erika is the lucky intern who was chosen to complete this project. ARC’s Science Department ordered the models of the cell membranes from Randy Schuster, the head supervisor of all the interns that make up the Design Hub. He has made sure to connect with nearly every department on campus, and runs the Design Hub in such a way that allows ARC’s campus to benefit from all of the hard work, talent, and innovation that comes out of the Hub.
The painted cell. Photo by photography intern Angelique Doty
The diagram of the model was sent from the Science Department to the 3D modeling interns at the Design Hub. They then transformed the structure into a file format that the 3D printers could handle. From there, the files were transformed into printable structures, and were given to Erika to paint and bring to life. She had to paint each minute crevice in the same way as the 3D printed grain, paying a lot of attention to detail. She is painting the cell membranes with acrylic paint, then sealing it with Mod Podge to prevent the acrylic paint from chipping. This project will be housed at the Design Hub lab room 311, and it will be on display in the Science classrooms. It will also be used as a class reference for the Science Department. The Design Hub is very proud of the collaborative efforts of our many talented 3D printing modelers, our artist intern Erika, as well as the Science Department. When art marries science and design, the possibilities are truly endless!